A bike chain is an essential part of your bicycle. It helps to transfer power from the pedals to the wheels, allowing you to move forward.
Over time, a bike chain can stretch and become too long for your bike frame.
If this happens, it’s important to shorten the chain so that it fits properly and works efficiently.
In this guide, we’ll explore how to shorten a bike chain quickly and easily with minimal tools required. With just a few simple steps you’ll be able to get back on the road in no time!
1. Removing the Bike chain
Determining whether the bike chain needs replacement
The first step is to determine if the bike chain needs to be replaced. If your bike chain has been stretched out over time, it might be too worn out and need replacing instead of shortening.
To do this, place a ruler beside a few links on the chain and measure their length. Most chains should measure 11/128″ in width. If your chain measures wider, it needs replacing.
Positioning the bike on a stand
Once you’ve determined that the chain needs shortening, the next step is to position the bike on a stand. This will make it easier to access the chain and help keep it in place while you make adjustments.
Depending on the type of bike, you may need a repair stand or just a flat surface that’s stable enough to support the weight of your bike.
Cleaning the chain
Before you can start shortening the chain, it’s important to give it a good cleaning. This will help to remove dirt and grime that has built up over time and ensure that no debris gets in the way of your work.
Use an old toothbrush and some soapy water or degreaser to clean off the chain.
Locating the master link
The master link is the piece of the chain that connects two ends of the chain together. It’s typically a small, silver piece with a single loop on either side.
To locate it, trace the chain from end to end until you find the master link. Once located, you can begin removing it with a pair of needle-nose pliers.
Rotating the pedals
Once the master link has been removed, rotate the pedals to move the chain out of the way and make it easier to access.
Then, count how many links you want to remove from the chain and mark them with a permanent marker so you know which ones need to be taken off.
Opening the master link
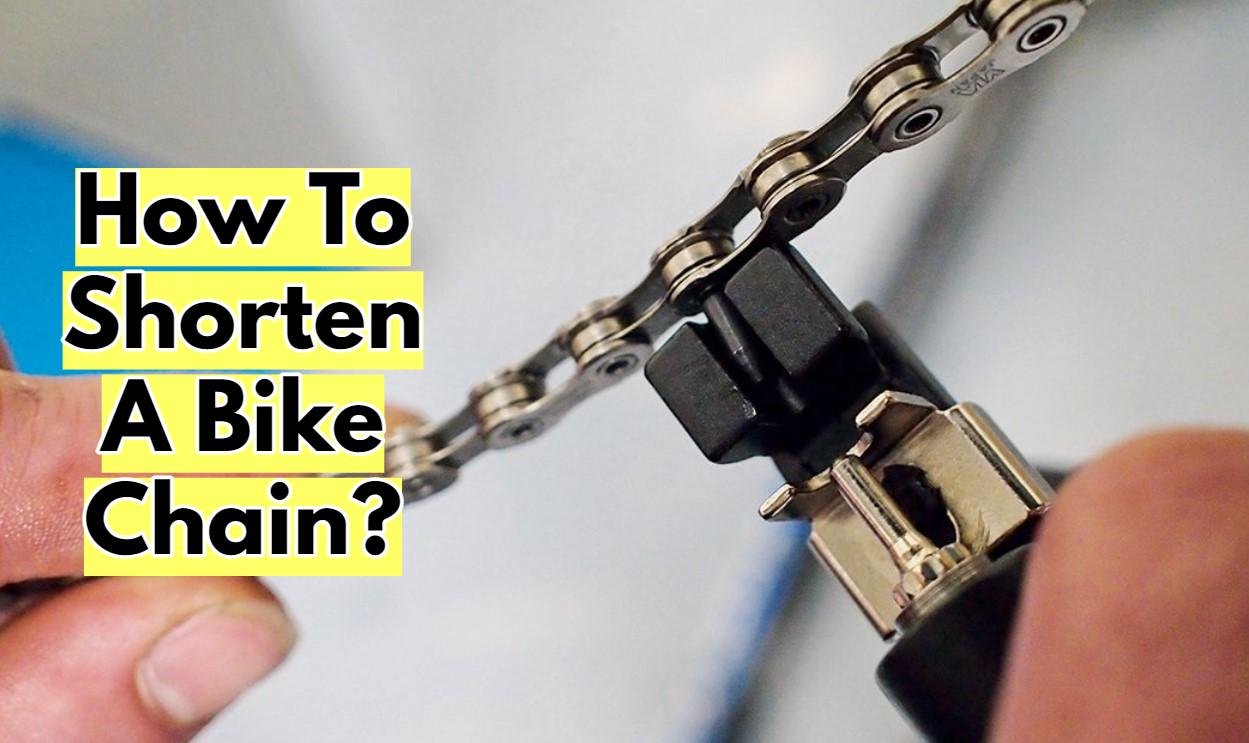
To open the master link, you’ll need a chain breaker tool. This is a small device that helps to push out the pin in the center of the master link and separate it into two pieces.
To use it, line up the tip of the tool with the pin and then press down firmly until you feel it pop out.
2. Shortening the chain
Measuring the number of links to cut off
Once the master link is opened, you can start shortening the chain.
Count out the number of links that need to be removed and mark them with a permanent marker so you know which ones to cut off.
Then, use a pair of wire cutters or an appropriate cycling tool to snip off the marked links.
Clamping the next link
Once the chain has been shortened, the final step is to reconnect it. To do this, you’ll need a clamping tool that comes with most bike repair kits.
Place the master link in the tool and line up the two ends of the chain.
Then, press down on the clamping tool until it closes completely.
Pushing the pin
The last step is to push the pin back into the master link. To do this, use a pair of pliers or a chain press tool (if available) and apply gentle pressure until the pin is firmly in place.
Make sure that you don’t over-tighten it as this could cause damage to the chain.
Repeating the process for additional links to be removed
If you need to remove additional links from the chain, simply repeat the steps above. Make sure to mark each link that needs to be removed so that you don’t skip any.
3. Reassembling the chain
Placing the master link on both sides of the chain
Reassembling the chain is the final step. Line up the master link with both sides of the chain and use a pair of pliers to push it closed until it snaps back in place.
Then, rotate the pedals to make sure that there are no kinks or twists in the chain before you finish.
Reconnecting the chain
Once the chain is reassembled, it’s important to make sure that it’s properly connected. To do this, slide the master link onto both sides of the chain and use a pair of pliers to press down until it snaps into place.
Loosening the chain
Finally, use a chain tightener tool to loosen the chain and make sure that it’s not too tight or loose. This will ensure that your bike is running smoothly and you can enjoy your ride without worrying about any potential damage.
Applying lubricant or oil
Once the chain is properly tightened, apply a high-quality lubricant or oil to the entire length of the chain. This will help to keep it running smoothly and prevent any rust or corrosion from forming.
Make sure to wipe away any excess lubricant before you head out for a ride.
These steps should help you with replacing and tightening your bike chain. With a bit of time and patience, you’ll be back out on the roads in no time!
Finals inspection of your bike
Before you head out for your ride, do a final inspection of your bike to make sure that everything is properly tightened and secure.
Check the brakes, drivetrain, tires, chain, gears and any other components to ensure that they’re running smoothly. Enjoy the ride!
Final Words
By following these steps, you can replace and tighten your bike chain in no time.
Remember to mark each link that needs to be removed and use the appropriate tools to open and close the master link.
Finally, apply a high-quality lubricant or oil to protect the chain from rust or corrosion. With these tips in mind, you’
Read More:
How to Fix Rubbing Disc Brakes on Your Mountain Bike?
How Long Do Bike Saddles Last?
Can a Cyclist Get a Speeding Ticket?
Are Road Bikes Easier to Ride Uphill? Explained