Peloton’s business is booming. Because more people prefer to exercise at home rather than in the gym.
This fitness company offers exercise bikes and treadmills. And they are becoming popular for thousands of live fitness classes that are demandable and you can do at home.
Without a Peloton bike or bike plus, participating in Peloton training sessions is pointless. These exercise bikes are very popular for home workouts.
Unfortunately, buying great hardware also means getting it set up properly. And that includes adjusting the Peloton or Peloton bike plus screen. So, we have decided to demonstrate everything about adjusting it.
Read More:
Peloton Touch Screen Not Working? How to fix? (Full Guide)
Peloton Fastboot Mode Explained (Complete Guide)
Why Peloton Heart Rate Monitor Not Working? (Cause and Fix)
Peloton Resistance Knob Not Working? Here’s How to Fix It
Everything You Need to Know to Adjust Peloton Bike and Bike Plus Screen
Every Peloton bike purchase includes shipping and setup. But due to the pandemic’s restrictions, delivery men might not be able to enter your home. What will you do then?
Then you will need to complete the setup process yourself. Fortunately, adjusting the screen of a Peloton bike or bike plus is easy to do. Let’s begin with starting to know your home screen –
Get to Know Your Peloton Home Screen
The new Peloton home screen is something that creates the addiction of cycling and keeps you engaged for a long time with cycling instruction, challenges, recommended programs, and more. Although the original Peloton bike screen may not offer much, the new and larger screen will sure have an impact on your daily exercise.
The home screen presents what you like at the center. The more you take classes, the more recommendations will appear in front of the screen. Also, you can find your favorite programs and training sessions easily by using the filters and an interactive search bar.
Source: onepeloton.com
There is so much to do with the new home screen. Along with finding tons of instructors online, picking daily workouts, highlighting recommended artists, you can set your fitness goals and work out with your friends.
Now we will look at the regular features as well as the new features of the new Peloton bike plus screen.
The Features For Your Workout –
Find your instructor:
The new home screen of the Peloton or Peloton bike plus helps you to find instructors based on your exercise type. Whether you are cycling, taking yoga classes, there is always an instructor who can guide and motivate you. All it takes is a simple click and you can access their classes directly.
Enroll in the recommended classes:
The home screen also highlights the recommended programs that are suitable for you. You can easily find a collection of recommended programs by exploring.
Plenty of daily picks:
If you don’t want to work out with your Peloton bike, then there are plenty of daily picks that can help you to do a different exercise. And you will always find something new and interesting as the daily picks get refreshed every day.
The most popular programs:
If you are not happy with the daily picks, then a carousel of the classes will help you to find an effective exercise where the maximum number of members have joined.
Music will make you inspired:
Keep exercising while listening to your favorite music. Music inspires you to move according to your workout. You can find the tracks from the recommended artists section.
Work out with your friends:
This new feature of the Peloton screen shows how your friends are doing. You can check your friend’s recent classes and the classes that your friends are currently enrolled in. Join your friends to power up your Peloton sessions.
Take regular challenges:
To keep up with your friends, take regular challenges. These goals will help you to make a commitment to yourself to finish the workout lessons. You will see the challenges that you are currently taking and the ones that are next.
The New Technical Features –
Connect via the Apple Gymkit™:
That’s right! Now you can connect your apple watch to your Peloton bike. This feature helps you to take live and on-demand classes, adjust automatic resistance during a class transition with its auto-follow program.
To verify whether or not your apple watch is functioning, it is better to leave it connected for at least 30 seconds.
Connect a device via Bluetooth:
Now you can connect a Bluetooth speaker to your Peloton or Peloton bike plus. So listen to your favorite music while you are exercising. Not just speakers, you can pair any device with your Peloton bike that supports Bluetooth connectivity.
Miracasting:
The technology of the Peloton bike jumps to the next stage with the Miracasting feature. You can stream your training classes to your smart TV directly with this feature.
All you need is a reliable WiFi connection and a smart TV. Make sure your Peloton bike and the TV are connected to the same WiFi network.
Why Do You Need to Adjust the Peloton Screen?
Yes, this is the first question that may come to your mind when you are a beginner. Let’s think of the previous generation stationary bicycles that were difficult to adjust as they didn’t have the ability to move the screen.
So, you couldn’t control the movement of the screen and see what your instructor was doing while standing in front of the screen next to your bike.
When you are unable to rotate or adjust the monitor from side to side, it will be difficult to see the angle, especially when exercising on the ground.
However, you can install a pivot in the latest versions of the Peloton bikes and rotate the touchscreen.
Once installed, you can move, swivel, rotate, and adjust the screen as you wish. Well, this is actually very useful if you are not cycling during your workout.
Can You Tilt the Original Screen?
It is possible to tilt the original screen vertically from 0 to 30 degrees. And it is quite easy to tilt the screen. Gently grab both sides of the screen and tilt it in your desired direction.
When tilting the screen away from the frame, hold it from the top and bottom for gaining stability. Then tilt it lightly towards your comfortable line of sight.
The best way to keep the screen out of sight, and even improve your view, is to tilt it up. You can also tilt it down and to the side for a better view of your workout.
When you are on the floor for strength and yoga sessions, it is best to tilt the screen facing down for a better view. Otherwise, you may have to tilt it flat or slightly upwards when you are standing.
Can You Rotate the Original Peloton Bike Screen?
Okay! Now that you know the home screen of the Peloton bike, it’s time to look at some of the basic adjustments. Many of you might be wondering – “Is it possible to rotate the original Peloton bike screen?” The direct answer would be it is not possible to rotate the screen side-to-side.
Now comes the good news. Peloton has announced plans to launch a new premium stationary model called the “Peloton Bike Plus”. This will come to the market on 9 September, this year. And it is said that customers can get this new bike for $2,500.
While Peloton may have dropped the price of the original stationary bike, Peloton has maintained its elite edge for the new model. Luckily, users will get a larger screen that can rotate 180 degrees.
The new Peloton Bike Plus screen is about 23.8 inches wider than the original model. With a 180 rotation (left and right), users can seamlessly enjoy both cycling and floor-based workouts. So, this is obviously good news for the loyal customers of Peloton and those who are looking to get a new stationary bike.
How to Rotate Your Peloton Bike screen?
We have already told you that the new screen of the Peloton bike plus can rotate 180 degrees. However, it’s a shame that the original Peloton bike’s screen doesn’t rotate. As a result, it is not possible to adjust the viewing angle when exercising on the floor.
Luckily, you can still rotate your Peloton bike screen with an awesome accessory. This accessory will let you rotate the Peloton screen around.
Therefore, you can work out beside or in front of the bike for floor-based exercises. No matter where you choose to exercise, the screen will rotate accordingly to match your position and location.
This accessory is a pivot from Top Form Design. You can install this piece of hardware on your bike for rotating the screen to left, right, and all the way to the front.
Using the pivot, you will access tons of extra functionalities by using the giant Peloton screen to do floor-based workouts like stretching, strength, yoga, and meditation classes.
When rotating the monitor, make sure the vertical angle doesn’t change by tilting. If it’s tilted, bring it back to the correct vertical angle. Then rotate it to the desired position 180 degrees on both sides of the screen.
Can You Make the Peloton Screen Swivel?
When it is not possible to rotate the original screen of a Peloton bike, it is also not possible to swivel.
The new and larger screen of the Peloton Bike Plus may rotate 180 degrees, you can’t make it swivel all the way around or 360 degrees.
With the help of the pivot, you can make the original Peloton bike screen swivel. This particular hardware is specially designed for the original Peloton bike. It helps you to swivel, rotate, and angle the home screen.
In terms of pricing, it is not even expensive. While the pivot adds tons of functionality to your Peloton, its retail price is only $49.99 from the official website. So, if you can’t purchase the new Peloton Bike Plus but still want to upgrade your original one, this would be a great accessory to have.
We found this video very helpful, discussing every possible way the pivot from Top Form Design can benefit your home workout –
Aside from the pivot, there are swivels that can be attached to the original peloton bike screen. Therefore, you can rotate the original screen from 0 to 360 degrees. On top of that, these swivels are not that expensive.
In addition to being able to rotate 360 degrees, the screen swivels allow you to tilt the screen to any angle; depending on your convenience.
Designed for the original Peloton bikes, the swivel is only compatible with the original bike, not with Peloton plus bikes. The intention of making swivels is to include the standards of the Peloton plus in the original bike.
How to Move the Peloton Screen Up and Down?
By moving up and down, we meant to say – how can you adjust the perfect height to your Peloton bike screen. Although it is not possible to move the screen up and down, you can get a perfect height by adjusting the handlebar or your seat.
Even the screen of the Peloton bike plus screen can be moved upwards or downwards. The larger home screen may rotate and tilt, but you can adjust the height separately without adjusting the handlebar or seat.
It is important to make better adjustments to your bike before riding. This includes confirming seat height, seat depth, and handlebar height are at the correct position. Otherwise, you may not experience the desired comfort while cycling.
Adjust the handlebar height –
First, we will know how to get the perfect height of your Peloton screen by adjusting the handlebar. Adjusting the handlebar can be difficult. But, getting a perfect view of your Peloton screen can be done by adjusting it to the correct position. Please follow these steps accordingly –
- You will notice a large L-shaped handle at the front of the bike.
- Start by loosening the handle. Don’t be afraid of giving some extra force.

- Typically, the handlebar is heavy and it can be challenging to adjust it when it is new.
- By default, the handlebar should be all the way to the bottom. Push it a little downwards to lose the tension.
- Now, pull up the handlebar until you feel the screen remains in a suitable position.

- If you find the handlebar is stuck, then forcefully pull them towards you. This can help you to pull up the handlebar so that you can adjust the screen height.
- Once you find a suitable position for the handlebar, tighten the L-shaped handle to secure it in place.
- Try wiggling the handlebar after tightening the handle to verify it is secured.
Adjust the seat height –
You can also adjust the seat height to get a suitable height for a convenient view of your Peloton screen. Unlike the previous process, this is a little different. Here you don’t have to pull up the handlebar. Rather, adjust the seat height keeping the handlebar in place. Let’s see how to do this –
- Start by clipping into your bike’s pedals.
- Maintaining a riding position, keep your hands on the handlebar.
- Then, bring your right foot to the 6 o’clock position.
- Check if your keen has a slight bend or not.

A slight bend of your knee at the 6 o’clock position
- If you don’t have a bend in your knee, lower your seat.
- On the contrary, raise your seat if you have a bigger bend in your knee.
- Similarly, if your knees are reaching too far, then lower your seat.
- And if your knees are going out to the sides, then raise your seat.
- Matching this will give you the perfect height aligning your Peloton screen.
- Don’t change the handlebar height while you are doing this. Leave it as it is.
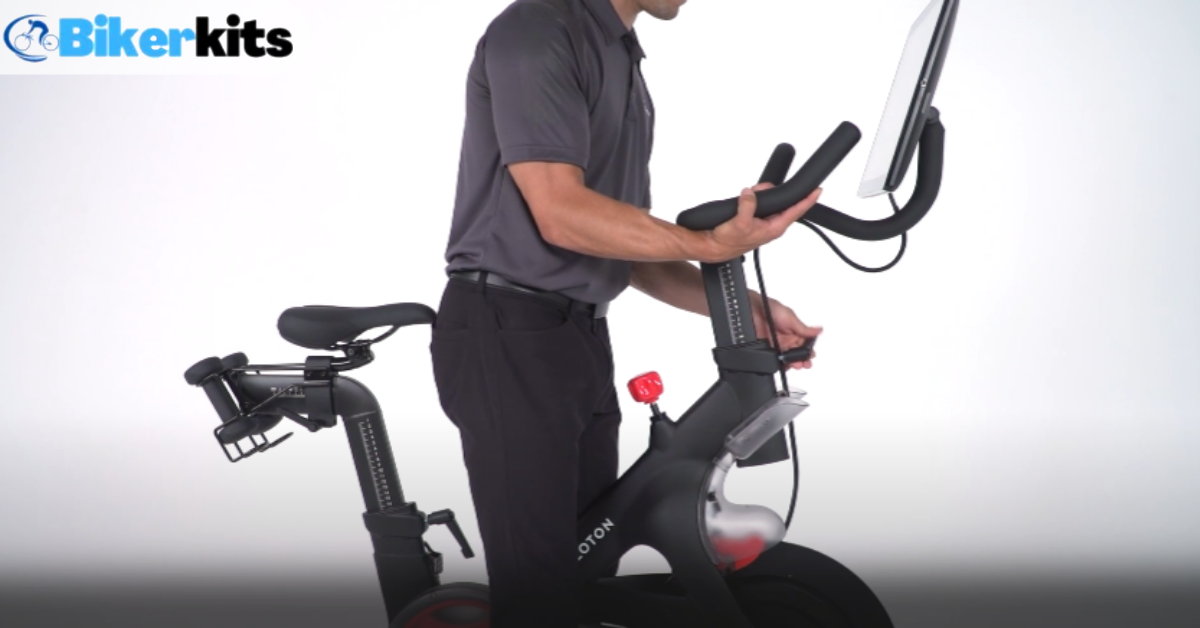
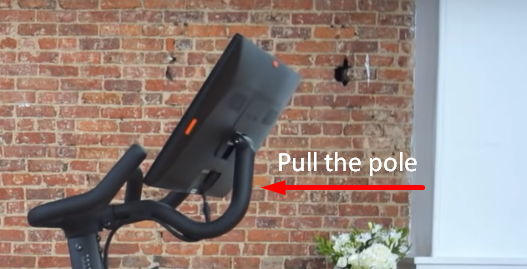
How to Move the Home Screen Further or Closer to You?
While riding, you may feel uncomfortable just because your hands and elbows keep hitting the screen. Again, some content of the screen can get blocked by your hand or elbow. If that is the case, then you should move the home screen closer or further to your position.
It can be done easily. Simply grab the pole that holds the touchscreen and pull it outwards gently. It is important not to apply force while you are pulling to protect the connection between the screen and the pole.
Method – 1
By moving your seat closer and further can get you a suitable screen view. It is called adjusting the seat depth. You can follow the below steps carefully to go with this procedure –
- You will find a lever below the seat. Loosen it by turning it to the left.
- Once the level gets loosened, slide the seat to your desired position.

- After setting the seat to a convenient position (matching the Peloton screen distance), tighten the level by turning it to the right.
- If this is the first time adjusting your seat, you can keep the seat at the center to get the most convenient view of your home screen.
You can also determine whether or not the seat is in a suitable position with your hand. Place your elbow at the nose of your seat and try to touch the handlebar with your fingertips.
If you can reach the handlebar with your fingertips, then it can be considered as a convenient position for a better view of the Peloton screen. If not, push your seat a little forward and then try again.
Method – 2
Another way to move your home screen close or back is to attach an adjuster. Now, remember! You don’t need to have a pivot to install an adjuster. The adjuster will be installed on the handlebar of your bike.
We recommend watching this video for installing an adjuster on your Peloton bike –
If you have successfully installed the adjuster, you will notice a side handle on it. Sit on your Peloton bike and loosen the handle clamp. Then, slide the screen accordingly to your desired position.
You can either push the screen forward or backward with the help of this adjuster. It will take some force to push the adjuster forward rather than pulling it closer. Once it is perfectly adjusted, tighten the handle clamp and you are ready to ride.
How to disconnect and reattach your Peloton touchscreen?
Ensure no connection by disconnecting the cables from the monitor to disable the touchscreen. Then, you can remove the square-shaped panel at the back of the monitor.
To remove the screws on the back of the touchscreen, use a Phillips screwdriver. Make sure someone is holding the screen during this process to prevent it from falling over.

Good! This is how you will detach the screen from your Peloton bike. Now it’s time to reattach the screen. To reattach the display, keep the touchscreen close to the display frame aligning with monitor mounting holes.
Tighten the supplied screws before replacing the square panel by using the same screwdriver (Phillips). Finally, reconnect the display cables and you’re done.

Things To Consider While Adjusting The Screen
By far, you might have learned quite a lot. If you are trying to adjust the Peloton screen in the best possible way, only learning the techniques is not enough. There are some facts that you need to consider while attaching, detaching, and adjusting the home screen. Let’s take a look at them –
- You need to be very careful with the cable management job. Make sure the Peloton screen remains off during the whole cable management process.
- Remember! You can’t tilt the screen further down after you have rotated it at a 90-degree angle from the normal position. Because the screen can hit the handlebars at this position.
- Be gentle while rotating the screen as it can get some scratch marks from the handlebar. So, be cautious when you rotate the screen left or right. It is better to rotate the screen according to one slight angle each time. And do it with patience, you have plenty of time.
For further and detailed considerations, please watch the following video. We can guarantee you will learn something new –
Some Peloton Monitor Adjusters to Help You Rotate the Screen
Nowadays, you can add an adjuster to your Peloton bike to unlock its extra features. Although we have talked about adjusters earlier in this article for moving the home screen closer or further, you can use them to rotate, swivel the screen.
While these adjusters are perfectly compatible with the standard Peloton bike, they are not suited for the Bike plus. Let’s take a look at some of the adjusters for your Peloton bike –
360 Degree Aviation Aluminum Screen Monitor Adjuster –
This little device can help your monitor rotate at a 360-degree angle. Furthermore, you can adjust the monitor closer and further from your sitting position. These handy little brackets are available at a cheap price and come with a year warranty.
Adjuster From Top Form Design –
Perhaps, this is the most perfect adjuster for any Peloton bike. This is specially designed for the original model and will not work with the bike plus models. Change your handlebar position seamlessly with this simple hardware. You will get a solid feel while riding as you will get the most suitable view of the display. The adjuster can move up to 3” with an additional 1-1/4″ in either forward or backward.

| Note: Peloton offers phone support to users who have trouble getting their bike set up or have other issues in the middle of the process. In the United States, you can contact Peloton customer support at 8664407445. |
Final Thoughts
Whether you have an old Peloton bike or a new Peloton bike plus, setting up the touchscreen is a way that you can do it yourself. And there are no restrictions on adjusting it. You can make the most of your Peloton workouts with the advantage of this technology.
The screen adjustment options provide comfort while watching the screen whether you are in and out of the bike. Thus, you will no longer experience neck and eye strain when using a monitor setup that is unable to adjust according to your preference.
Related:
How to Turn on Peloton Bike & Get Started Spinning?
How to Clean Peloton Bike Properly! Detail Guide
How to Unclip and Take Off Peloton Shoes? (Beginners Guide)
How to Change Pedals On Peloton bike? (Full Process)
Peloton Bike Calibration: How To Do It Properly As Beginner?
How to Make Peloton Seat More Comfortable? (8 Easy Steps)
How to Put on Peloton Shoes and Clip Into the Pedal?
How to Connect PowerBeats Pro to Peloton? (5 Easy Steps)